Category Archives: Nail art tutorial

Tutorial – Argyle Nail Art for PolishUsPink

Yep, its October and the autumn is here. The leaves change their color and the nights are getting longer.

PolishUsPink

It´s getting colder and soon the snow will fall. Within our hearts there are still warm so that why we continuing the PolishUsPink from TheSubtleShimmer for Breast Cancer Aweareness.

My heart goes to all women out their fighting their cancer, not only breast cancer but all sorts of cancer.


This is my PolishUsPink nail art tutorial for you and this is what you will need:

Naglar Nya1Naglar Nya

  1. Base coat.
  2. Pink Polish, I’ve used Depend nr: 246.
  3. Acrylic paint, pink and purple.
  4. Top coat.

Start by painting your nails with your base coat and pink polish and let everything dry completely.

Then start doing your argyle pattern with your acrylic paint.

To do the diamond shapes easy start with a cross and the line the tops of the cross and simply fill the square you got.

I’ve done my square pattern with 2 different shades of pink but you can do yours with only one if you want to.Once the acrylic paint has dried, take out your purple and draw some small lines that looks like stitches over the squares.

Once dry apply top coat and your done.

For those of you with shaky hands, follow my clean up tutorial here.

118


Have a nice day and take care ^.^

3 Comments

Filed under Nail art tutorial, Nails

Tutorial – Neon Abstract

So I thought why not keep going down this neon style nail art?

Nagellack

What I used:

  1. Base coat
  2. Isadora – Marzipan
  3. Kiss – Neon pink
  4. Kiss – Neon purple
  5. Kiss – Silver glitter
  6. Top coat

This design are very easy to do but still look like you’ve spend ages on it.

  1. First of all, paint your base coat and you’re base color. Naglar Nya
  2. Then start with your pink and draw some triangles or squares on all your nails.
  3. Do this with your purple as well.
  4. Taking your silver glitter and draw some lines and make some dots.
  5. Do the same with purple and pink.
  6. Top coat and your done.

You can use your favorite color in different shades or make it pop out with some extreme colors.

This my end results using this simple technique for some fancy nail art, and everyone I’ve done it on loves it. (Click on pictures to enlarge them)

020

mor1


Shaky hands? Follow my clean up tutorial here.

That’s all for now, have a nice day ^.^

Feeling inspired by KiyomiNails? Share your inspired nail art here:

2 Comments

Filed under Nail art tutorial, Nails

Tutorial – Neon madness nail art

I went crazy and collected all my Kiss Nail art paint polishes and started doing some crazy nail art.

What you will need:

Nagellack

  • Base coat
  • White, black, silver polish
  • A bunch of neon colors
  1. Start with a base coat and one layer of white. The white doesn’t have to be neat, this is just a base for your neon so that they will pop out even more.
  2. Once that has dried you will paint your base color. I went for the pink one and it really stands out alot.
  3. When that has dried it´s time for the art to take place. On one of the nails start with doing stripes in black.
  4. Then stripes in silver glitter.
  5. Add dots with black on the black lines.
  6. Last but not least add pink dots inside the black dots.
  7. Moving on to the next nails. Paint 2 thicker lines with the neon blue down the middle of the nails.
  8. Add a silver line and 3 dots in the middle of the blue.
  9. In between the silver dots and the on the border of the pink and blue, add 2 pink dots on either side of the blue.
  10. Add pink dots inside the silver ones and add silver dots inside the pink ones.
  11. On the pinky I simply added some purple dots all over the nail.
  12. Then added pink dots inside the purple ones.
  13. And last but not least I added purple dots inside the pink ones.
  14. Top coat and tadaa!

Nails

050 (2)

*Note: I messed up number 5 and 6 in the tutorial picture.

Have a nice day ^.^

Feeling inspired by KiyomiNails? Share your inspired nail art here:

3 Comments

Filed under Nail art tutorial, Nails

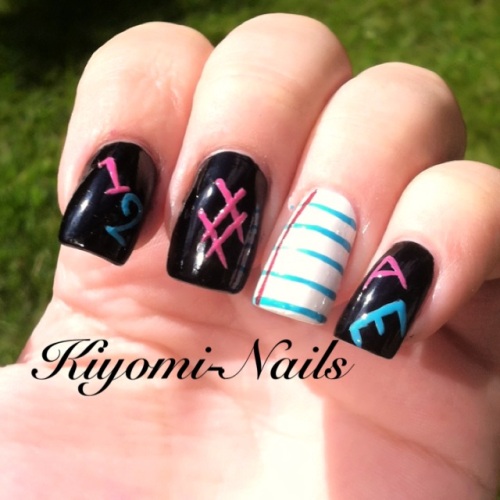
Tutorial – Back to school nail art

Yeah, I know that I´m a bit late with this tutorial. But I´m only human, and running 2 blogs and a life, I find that life has the most priority.


But here are my back to school Nail art, and yeah it is a tutorial.

Its inspired by 2 lovely ladies out there in the nail community, PolishAlcoholic and Cutepolish.

You will need:

  • Base coat
  • Black and white polish
  • Pink, blue and red polish
  • Matte top coat

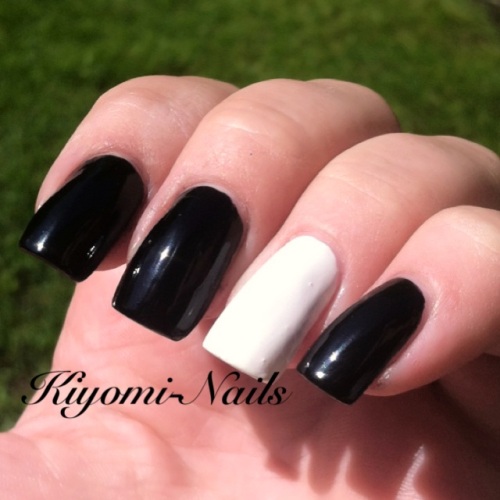
Lets begin with a coat of your favorite base coat and 2 coats of black except for the index finger where I painted 2 coats of white:
001

After that has dried, start to draw your letters or numbers on the black painted nails and make some stripes onto your white:
002

Then use your pink to paint your other letters or numbers to your black nails and use the red to draw a line from cuticle to free edge on one side on your white nail:
003

Apply your favorite Matte Top coat and your good to go:
004
And dont forget to take care of your cuticles.

For you with messy hands, you can find my clean up tutorial here.

That´s alla for now. Have a nice day ^.^

2 Comments

Filed under Nail art tutorial, Nails

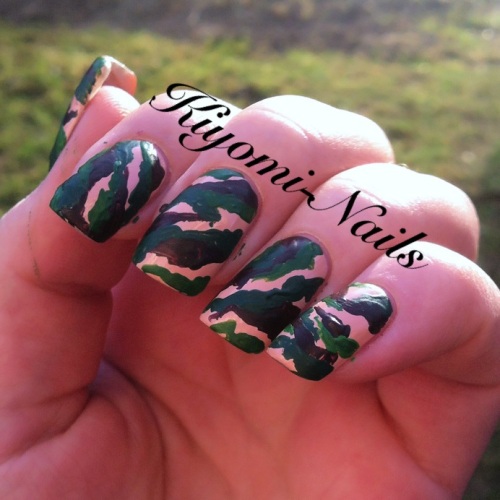
Camouflage Nail Art Tutorial

So, yeah. Here we go with my lost photos of this tutorial. I thought they where on the laptop, but I was wrong.

I´m such a confused girl, but at least I found the pictures. They actually where in my posses all the time, at my extended hard drive. Blaahh.

So with the findings of my pictures here we go.


For this design you will need:

Base coat, nude polish, green, yellow and black acrylic paint and a matte top coat.

Start by paint your nails with your base coat and apply your nude polish. In this picture I used 2 coats of my nude color.

016


After that I started to mix the acrylic paint until I got the 3 colors I wanted. Started with the darkest one of my choice which where brown.

017


After that I added the next color in line, the darker green one.

018


Last I added the lightest color, the green-yellow color.

020


Once dry, paint your nails with the matte top coat and your good to go.

Having trouble with getting neat nails – Follow my cleanup tutorial right Here.

Have a nice weekend all ^.^

Leave a comment

Filed under Nail art tutorial, Nails

Wooden Nail art tutorial

Its time for another tutorial. This time my inspiration was wood. I like the wooden textures and all the different kinds of brown tones and pattern there is.

So here´s my wooden nails.

What you will need:

Base coat (not in the picture), Nude-, brown-, black-, red-, gold-, yellow- polish and matte top coat.

You can do this with just a bunch of brown tones also, but since I didn’t have that I mixed my own tones of brown.

031


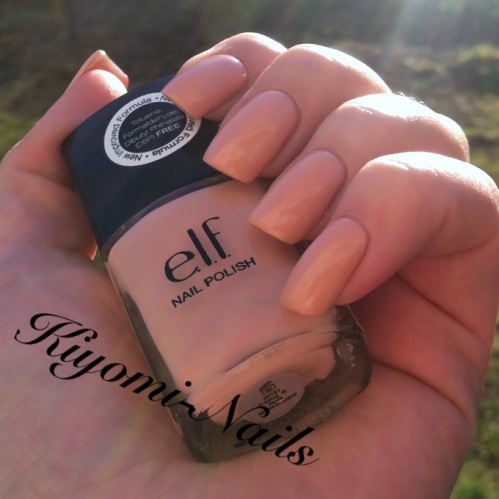
1. Start of with base coat and your nude polish. This nude are from elf-cosmetics and this is one of my absolutely favorites among the nudes Iv’e tried.

015


2. Bring out one of your lighter brown polish or mix your own like me. I mixed dark brown with yellow and gold. Draw lines in a wooden pattern and if you doesn’t know any wooden patter you can google it and find loads of wooden textures. You have to work quite fast so the polish wont get dry and mess up your design. Another trick is to poor a small amount of polish on a wax paper, foil or paper plate and paint one nail at the time.

035


3. Next up is to take another brown polish darker to the one you just used. I mixed red, brown and gold for a more darker and red-toned appearance. Remember That the lines doesn’t have to be neat and perfect. And don’t be afraid to be a bit unsteady and shaky on your hand, that will only make it more naturally.

036


4. Now to the black part. Iv’e just added a few stripes to make a depth to the design, making it look like shadow.

037


5. To finish this of top and seal your design with a matte top coat and your done.

038

039


Hope you’ve liked this tutorial and have a nice weekend. ^.^

1 Comment

Filed under Nail art tutorial